Introduction
Prey and Predator was a gym class game that we used to play that would involve two or three teams with different roles. Those roles are the "prey", the "humans", and the "predators".
The rules are pretty simple, if you're a prey run from everyone, if you're a "human" run from the predators and chase after the prey, and finally if you're the predator, chase after everyone.
Those rules are easy to explain to a person, not so easy to explain to about 1000 or so circuit components.

Why Minecraft?
This was a way to program without knowing how to program. Before learning to program, Minecraft was becoming a huge hit and happened to implement something called "Redstone" that mimicked very basic computer components called 'logic gates' and was designed to help players control whether doors were open or closed and things like that. They could also do other simple things like check if two switches were on, or invert a signal and so on, but it turns out (just like in real-life) by combining lots of these basic components, you can build very complex machines!
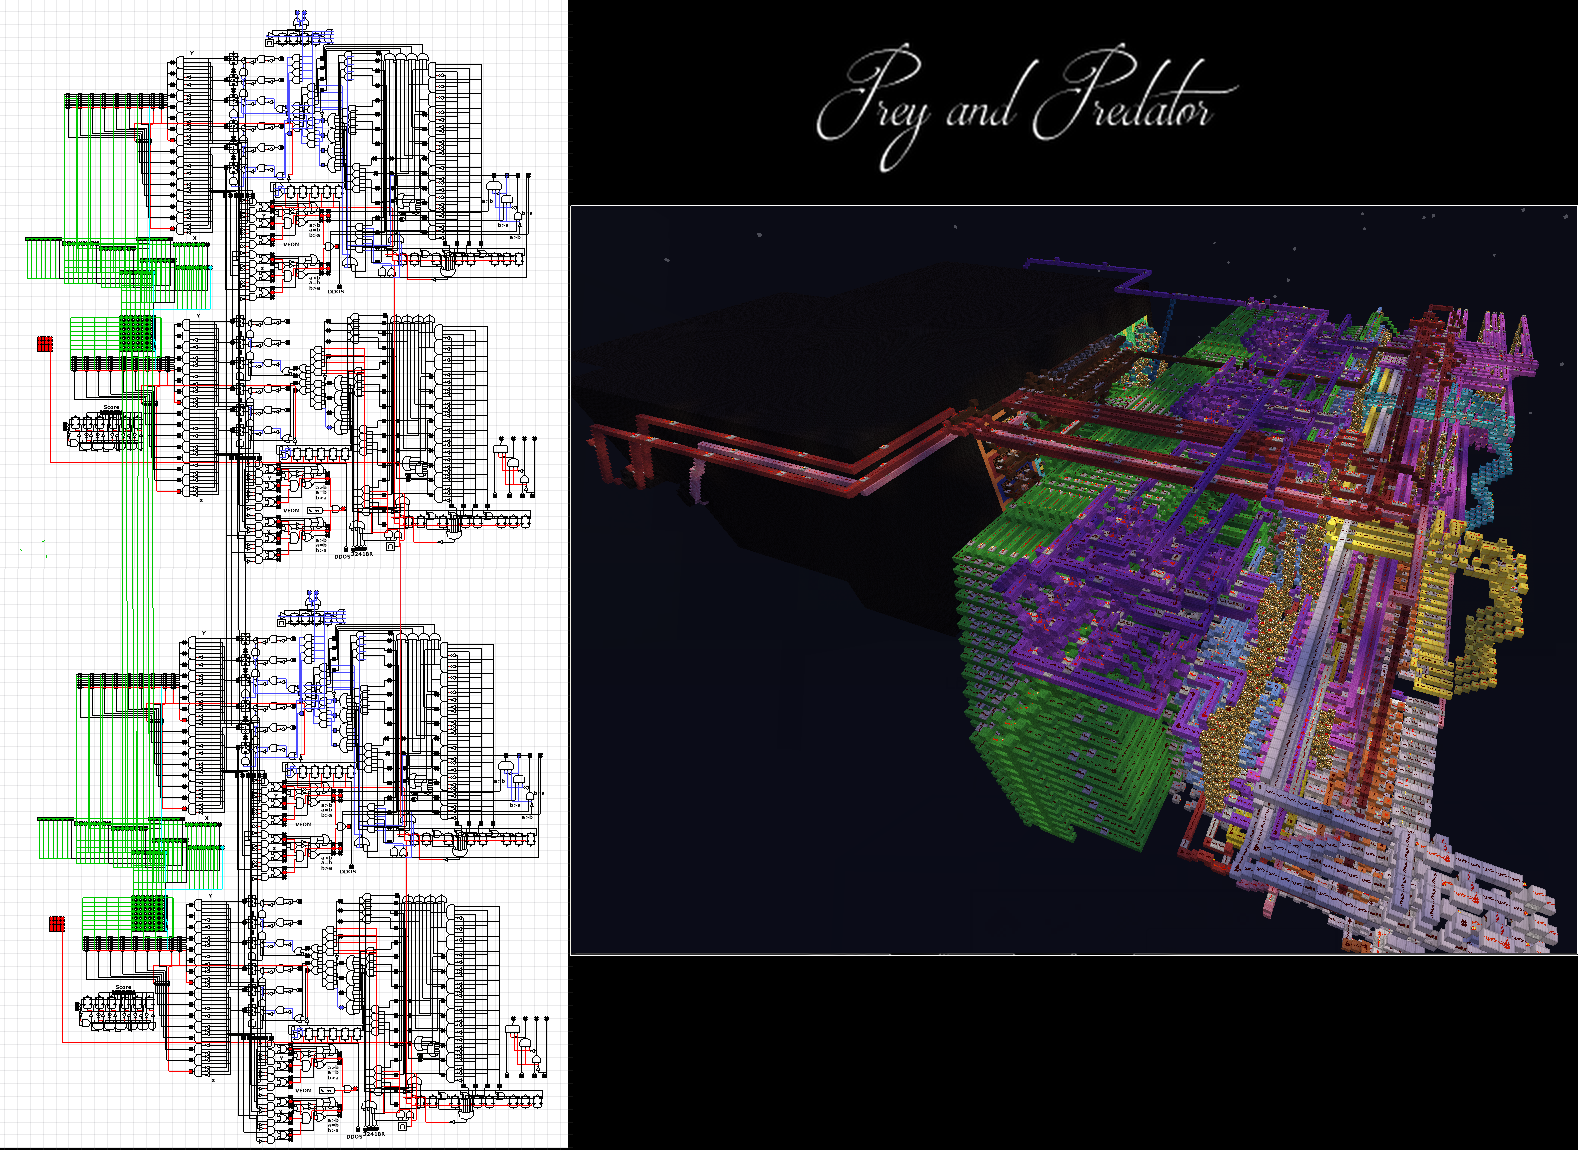
People started out building calculators, seven-segment displays, etc... eventually people even starting building games, CPUs, ALUs, and full fledged (4 bit) computers! This fit into my niche pretty well and I got involved! Below you can see an image of the Minecraft Redstone logic and the (roughly) equivalent circuit.

What does all that do?
There are eight components (shown below) that had to be built out of Redstone logic, in order:- Pseudo Random Number Generator: Random numbers need to be generated to generate movements. 4-digit binary numbers (between 1 and 16) are used.
- Bias Generator: But they can't just walk around aimlessly, so they need to be able to generate random movements that are biased towards the direction they want to go. (The game wouldn't be very fun if they were perfect!) This unit divides up those 16 numbers into four chunks. Each chunk will eventually correspond to a direction. For unbiased movements (when the character doesn't have a preference), those 16 numbers are evenly divided into the four chunks. For biased movements, three of the chunks have 3 numbers, while the biased one is connected to 7 (giving it the highest probability of being 'on').
- Bias Movement Selector: Now the biased wire gets selected most often, but how do I decide that 'up' is biased/desired, for example. This component takes in the four wires from the Bias Generator making special note of the bias wire. It also takes a direction as input, so that if 'up' is selected, the output of this unit will have the bias wire connected to the 'up' action in the calculator.
- Calculator with Memory: The calculator receives an action, move up, down, left, right (one of which could be biased). It then takes the current position which is stored in the calculator and changes either the x position, or the y position on the screen and increments or decrements it, based on the desired movement. Additional circuitry is required to prevent it from going out of bounds.
- Movement Checker: There is the question of what to do when a character ends up trying to walk out of bounds. There are other options, but I decided to not let them wrap around and instead prevent the movement. There may be better ways to implement this, but its so difficult to change design when you're putting down blocks to design circuit, that I stored the previous position and the current position after a movement and compared the two. If they were equal, they didn't move and a new random movement would be generated. The main drawback is that each movement takes about 10 seconds to run through the Minecraft circuitry, so having to wait for a new movement to be generated (which could also need to be regenerated!) slows the game down a lot.
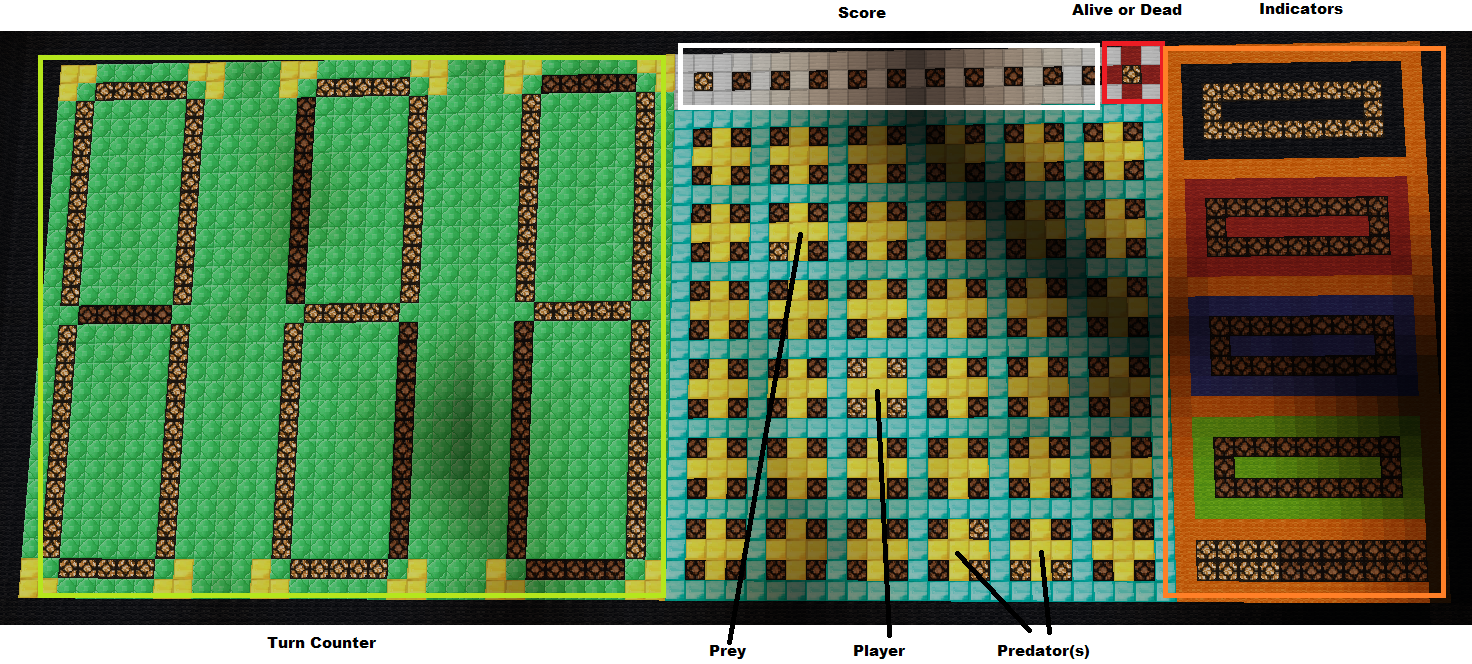
- Screen: Finally, and perhaps most importantly, the screen. This would simply display an icon (an arrangement of light blocks) at the calculators (x, y) coordinate.
- Joining all the Characters:[Not pictured] This is all great, but you need the three tiers of characters to be able to play the game! Since I went with four characters (one prey, one player, and two predators), I basically had four copies of all the above circuitry (With icons corresponding to their character type).
- AI: [Not pictured] The final piece to the puzzle was to be able to get them to interact with each other, tell the prey to run and to tell the predators to chase! For this the simplest thing to do is, find out the nearest (important) character to you, and compare the x distance, and y distance. Then a bias movement would be selected based on whether you wanted to move towards or away from the target. (Arbitrarily, I made it focus on the smallest of the x, y distances.)


